

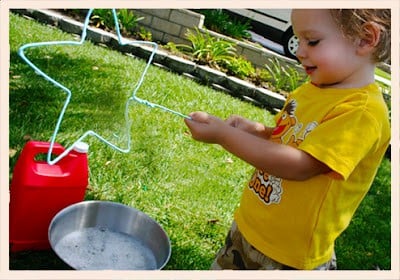

baby loves bubbles...actually, i think all kids love bubbles. they can go from screaming and crying to giggling and laughter with the "pop" of a bubble. in fact, bubbles also have many developmental benefits such as gaining eye contact, learning patience, hand eye co-ordination when you pop them, developing spatial awareness & exercise as little bodies stretch, reach and run to catch the bubbles.
so i've been wanting to make some fun bubble wands for baby to make bubble blowing extra fun! bigger bubbles are always better in my book. and since it is Earth Week this week, i wanted to show my kiddies that you can
so i've been wanting to make some fun bubble wands for baby to make bubble blowing extra fun! bigger bubbles are always better in my book. and since it is Earth Week this week, i wanted to show my kiddies that you can

things, instead of throwing them away.
so, i had a bunch of wire hangers just sitting around....about to be thrown away. i thought, why not make bubble wands from them instead of filling up a landfill. so, i did. and here is how you can make your own handmade bubble wand:
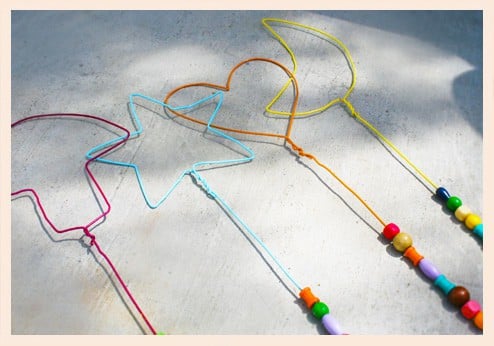
what you need:
• needle nose pliers
• wire hanger
• beads with holes big enough to string onto the wire (optional)
• spray paint (optional)
• glue gun (optional)
step 1
using needle nose pliers, untwist and straighten out a wire hanger. (the whole bending process of the hanger was a bit harder than i thought, but the job got done.)
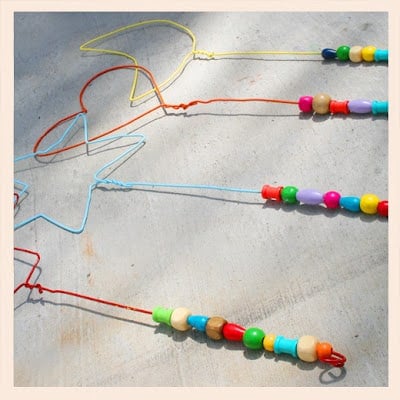
step 2
using needle nose pliers, twist the wire hanger into the desired shape. make sure one end is at least a 12" long straight length for the handle, and the other end has a 1" straight length that you will connect. to make curved shapes, it helps to use a metal canned food can to shape the hanger around.
step 3
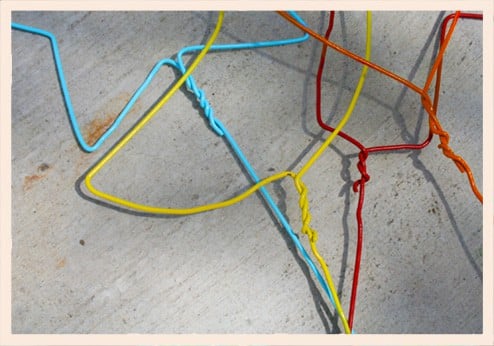
connect your shape together like the picture below. use yourneedle nosed pliers to twist the wire around, making sure that there are no sharp edges sticking out.
step 4
if you would like to spray paint your bubble wand...now is the time to do it. once dry, move onto step 5.
step 5
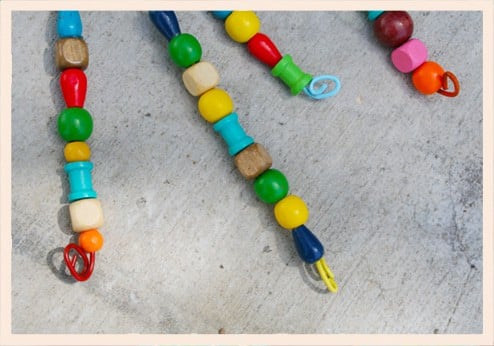
string beads onto the handle of your wand. i found these great colorful painted wooden beads at Michael's Craft Store.
step 6
using needle nosed pliers, twist the end of your bubble wand into a spiral to keep the beads on. make sure the end is not poking out too scratch anyone. see the picture below.
step 7
if you put beads onto your bubble wand, it's a good idea to glue them down....or at least the top one so they done slide up and down the handle. i just lifted the beads up, put some hot glue onto the handle and slid the beads down again. then they were stuck.
step 8
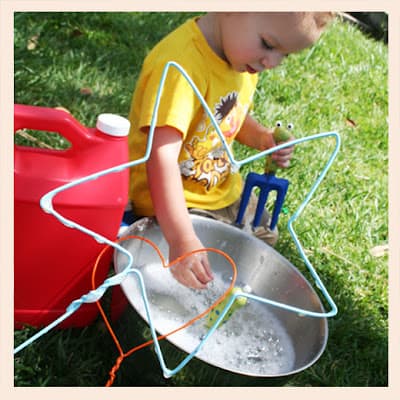
tada! you are finished. now enjoy your bubbles. you will need quite a bit of bubble solution though. i bought a huge jug at 
wrapping a pipe cleaner around the entire shape on the top of your bubble wand can allow the bubble wand to hold more bubble solution. which = more bubbles.

wrapping a pipe cleaner around the entire shape on the top of your bubble wand can allow the bubble wand to hold more bubble solution. which = more bubbles.

tatjana
very nice, thanks! You should really have a comment on this beautiful post 🙂
Trudy
Jill,
Just a courtesy note to let you know I have pinned your “Homemade Bubble Wands” post to a pinterest board with a collection of learning resources to complement the “Bubble Mania” app. You will find lesson ideas, learning activities and reviews for a range of apps on my boards. You can view my boards at http://pinterest.com/fingerpprojects/.
Warm regards
Trudy
Sabine
I love this idea...I'm going to try it. I'm not crafty but my kid LOVES bubbles so I think it's worth a try.
jill
They work really well if you wrap pipe cleaners around the tops. It helps them grab more bubble solution.
Susan Dominy
Amazing idea. Thank you so much for sharing.